How To Import WooCommerce Products

One of the most important steps when setting up your WooCommerce store is when you add products to the store. This can be a very time consuming process if you have many products and are adding them manually. Instead, you can easily import WooCommerce products to your store.
Benefits of Importing Products Into WooCommerce
There are many pieces of information that go into each product in your store. The product name, description, prices, variations, and images are just a few of the pieces of information you need to add. When adding a product manually, it becomes a very time consuming process to copy and paste this information in. Plus, you run the risk of forgetting to enter certain information, or entering it in the wrong place.
When you are moving to WooCommerce from another ecommerce platform, you can usually export all of your products to a single file. This file should have all of the relevant information, which makes it much easier to import products into WooCommerce later on.
Steps To Import Products Into WooCommerce
If you are using WooCommerce version 3.1 or higher, there is a built in product CSV importer and exporter tool. This tool makes it easy for you to import, export, or update thousands of products at once. With the WooCommerce import tool you can even update products, so if your inventory or prices need to be updated periodically, you can run the import tool again with the updated information.
Create A CSV File
If you navigate to the wp-content/plugins/woocommerce/sample-data directory, you should find a file called sample_products.csv. This file is set up in the format that the WooCommerce importer expects the file to be in. Download the file to your computer, and open it with a program like Microsoft Excel, Apple Numbers, Google Sheets, or OpenOffice Calc. You can also use a plain text editor like Notepad, however you have to be very careful to place commas in between each entry in the correct format otherwise your data will get messed up. It is usually easier to use a visual editor to add information to the CSV file.
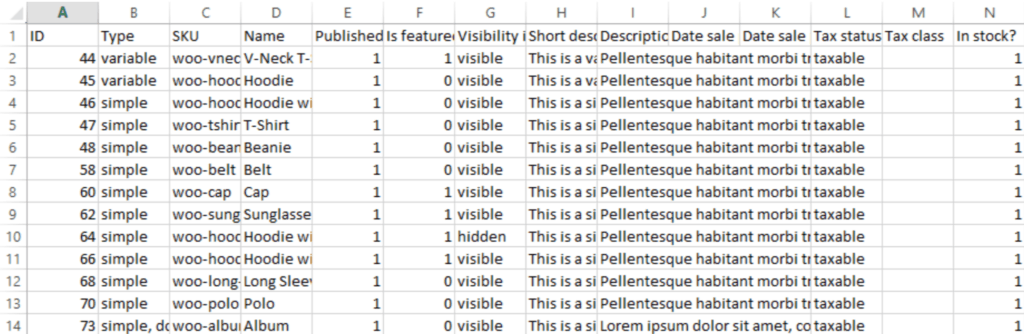
When you open the CSV file, you will see that it is populated with some sample data. You can delete all of this data, however leave the heading row in place (row 1 with ID, Type, SKU, Name, etc).
How To Enter WooCommerce Product Information In The Import CSV File
Certain information needs to be entered in a specific format, otherwise the WooCommerce product import won’t know exactly how to handle it.
- True/False: Some fields, such as those that use a checkbox in the product settings, are either true (checked) or false (unchecked). In the CSV file, you should enter a
1if it should be true, or a0if it should be false.- Published column use
1for published,0for private, and-1for draft. - Backorders Allowed column use
1for allowed,0for not allowed, ornotifyfor allow but notify customer.
- Published column use
- Categories: If you have a hierarchy for categories you should use a
>in between each. For example, if a parent category is Computers with a child category of Laptops, you would enter it asComputers > Laptops. - Multiple Values: If a field requires multiple values, separate those values with a comma. Those values should be wrapped in quotes if you are editing the CSV file in a plain text editor. A spreadsheet program should be able to add the quotes in the correct location for you.
- Referencing Other Products: When referencing other products you can use the product ID or product SKU. To use the product ID, prefix it with id:. No prefix is needed for a SKU. Fields that accept product ID or SKU include: Parent, Grouped Products, Upsells, and Cross-Sells.
- Images: Images must be online in order to be imported. If you have already uploaded the product images to your Media Library, you can use the image filename. Otherwise a URL to the image should be used. This will import the image into the media library.
Importing New Products
- Navigate to WooCommerce > Products.
- Click the Import button at the top.
This will open the Upload CSV File screen.
- Click the Browse button to choose your CSV file from your computer.
- Your website server sets the maximum file size. If the maximum size is too small to handle your file, either contact your host to increase the maximum size, or split the CSV file into multiple smaller files and upload them separately.
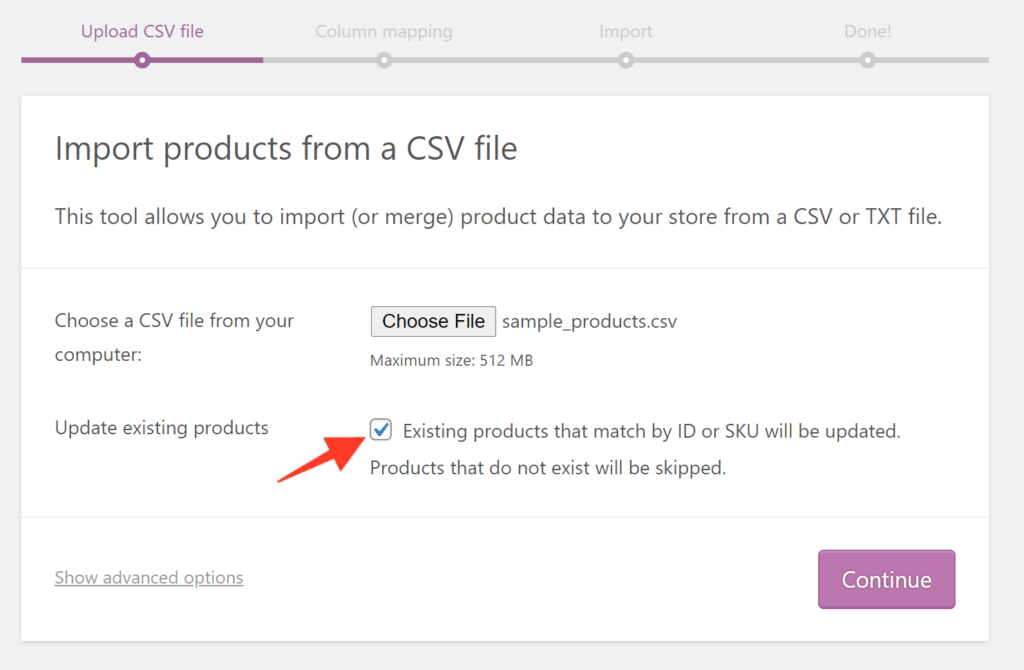
- Leave the Update Existing Products box unchecked.
- Some people upload their CSV file to their servers. You can enter the path to the CSV file on your server if you did this.
- Most times CSV files will use a comma as the delimiter between fields. However, sometimes you may use a different character. Enter the character used here if it is not a comma.
- You can check the Use Previous Column Mapping Preferences box if you have imported to this site before and wish to use the same format as the previous import.
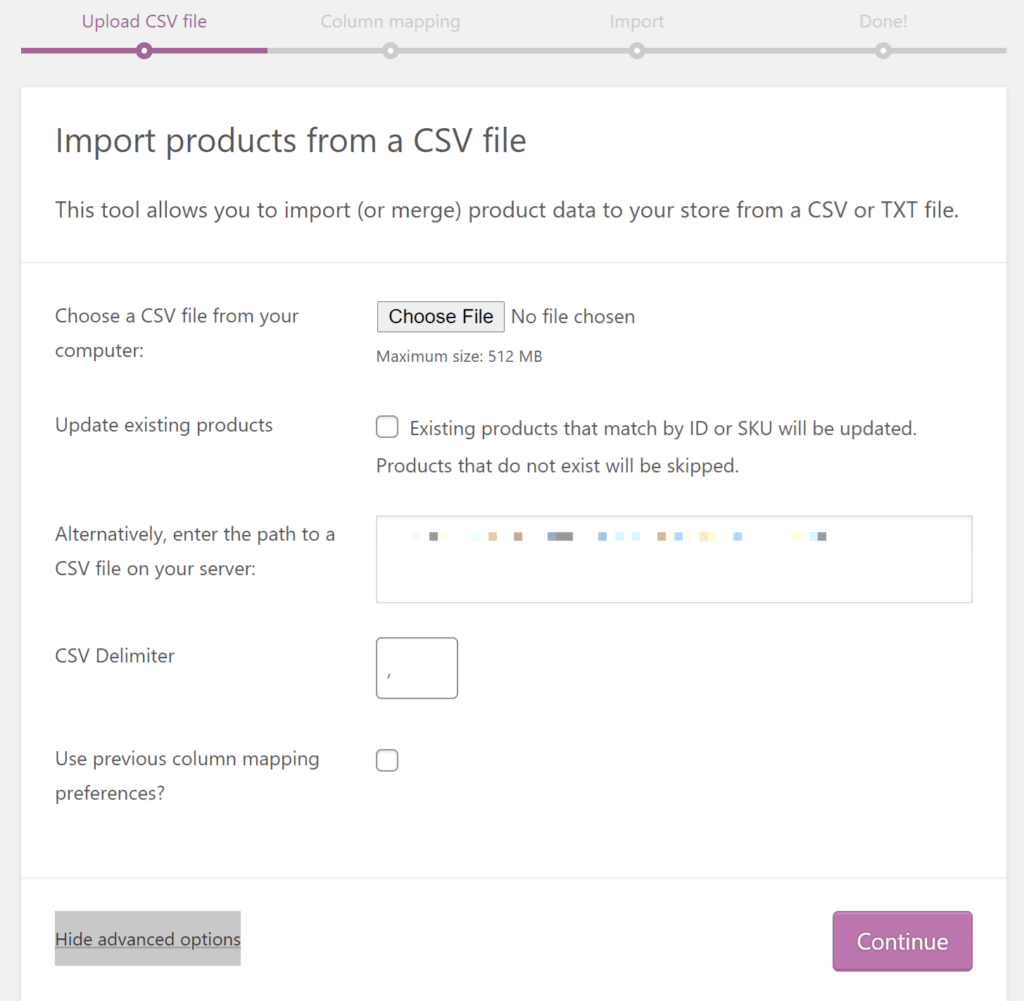
Click the Continue button to move to the Column Mapping step.
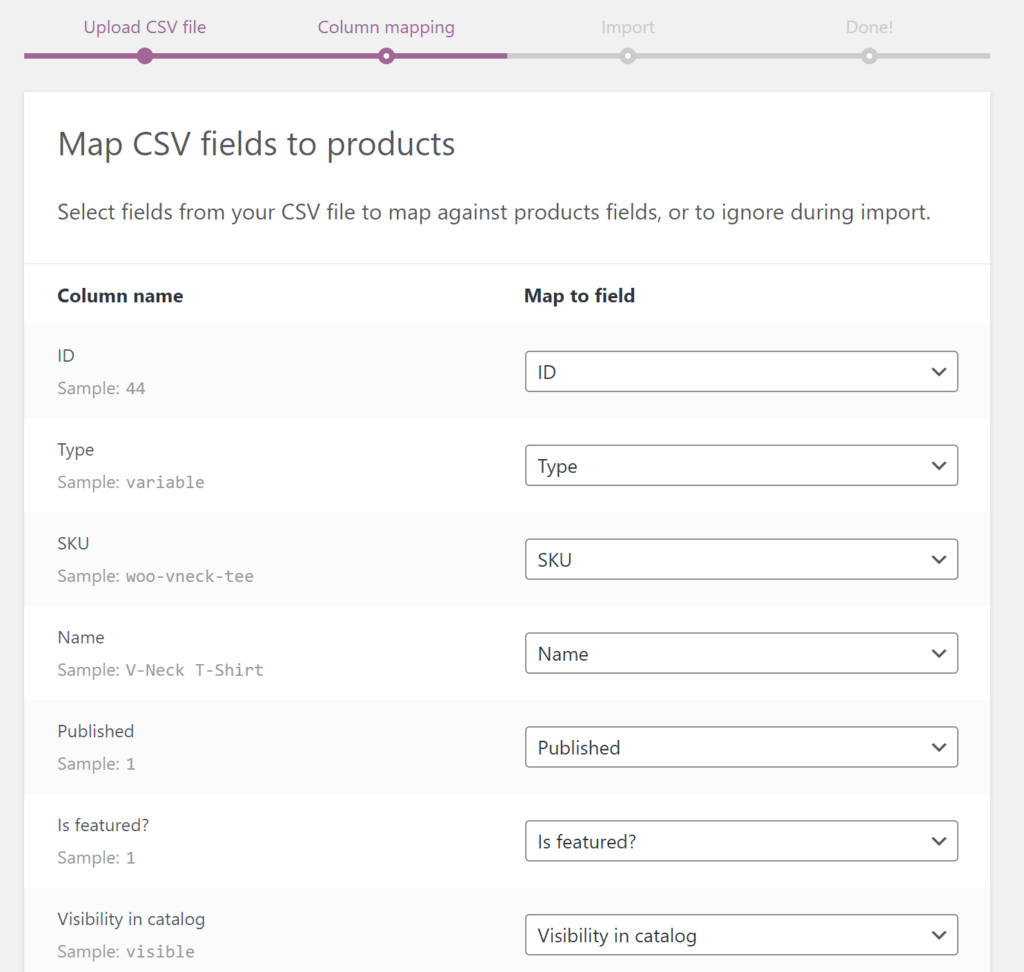
The Column Mapping step will attempt to connect the columns in your CSV file to WooCommerce product fields. If you kept the column headings from the sample CSV file in place, WooCommerce will automatically map the fields correctly. However, if you edited the column headings, WooCommerce will need you to select where you want the data from each column to go.
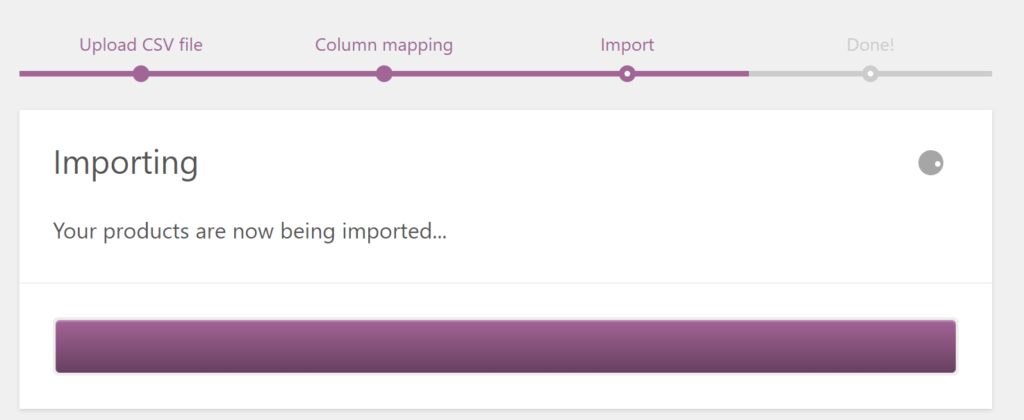
Finally, click the Run The Importer button and wait for WooCommerce to import the products.
Updating Existing Products
After you have added products to your WooCommerce store, there may come a time when you need to update the products in bulk. This can commonly happen when you receive a new shipment of inventory and need to update many products at once. It can also be necessary if you are running a sale and you need to update the sale price or the start and end dates of the sale. Whatever the reason, updating your products is just as easy as importing them.
- To start, use the same CSV file that you used to import the products originally. This way, all of the product IDs and SKUs will match.
- Edit that CSV file with any changes that need to be made.
The process to update the products is the same as importing new products with one exception. You should check the box next to Update Existing Products. If a product that is already in your store has the same product ID or SKU as a product in your CSV file, it will be updated to match the details in the CSV file. However, if a product does not exist in your store already it will be skipped.
Exporting WooCommerce Products
Exporting products from your WooCommerce store can be a useful way to have an up to date list of products in your store. That way if you ever manually added a product, you can still have a CSV file with all of your current product information.
- Navigate to WooCommerce > Products.
- Click the Export button at the top to view the Export Products screen.
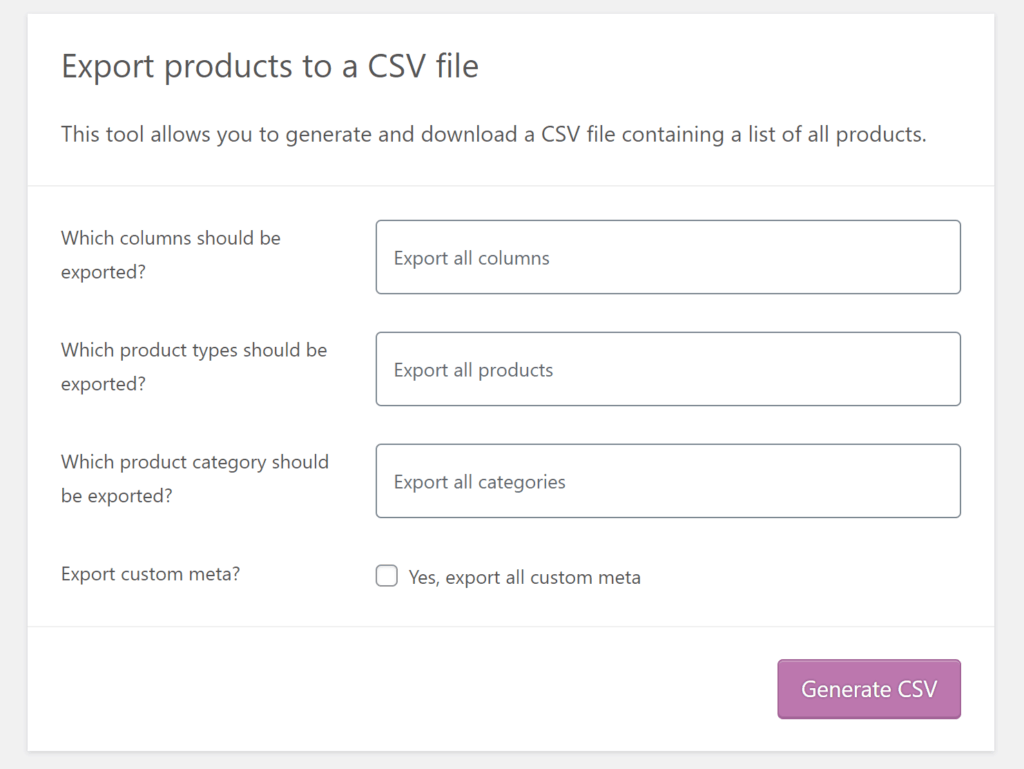
- Select the columns you wish to export, or leave the field empty to export all columns. Exporting all columns is a good way to ensure you do not miss any important information.
- Choose the product types to be exported, or leave the field empty to export all product types. Leaving the field empty will ensure that all products are exported.
- Select the categories you wish to export, or leave the field empty to export all categories.
- Check the box to export all custom meta information for your products. Meta data for your products is typically added by other plugins. This information can be important though if you wish to continue using those plugins, so it may be best to include it in the export.
- Click the Generate CSV button.
- Save the CSV file to your computer when prompted.